Sample: Color palettes sample
Overview
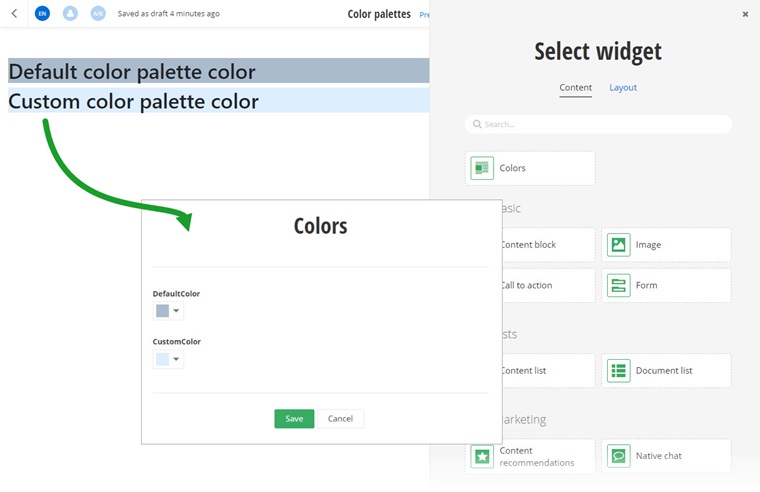
Use this sample to configure the values of the color pickers in the widget designers. With this sample, you create a widget named Colors that displays two color selectors – one with default colors, and the other with a custom-defined colors.
The name of the palette that is used for the widget selectors by default is called Default. This palette is used for the built-in widgets, such as the Section widget. Additionally, you can reuse it for other types of widgets by using the following attribute decoration:
You can override it in the appsettings.json file, like in the following example:
PREREQUISITES: You must set up a Sitefinity renderer application and connect it to your Sitefinity CMS application. For more information, see Install Sitefinity in ASP.NET Core mode.
NOTE: The instructions in this sample use Visual Studio 2022 and a Sitefinity renderer project named Renderer.
Create the folder structure
Under your Renderer project, you must create the following folders:
Entities/ColorsViewComponents
Views/Shared/Components/Colors
Create the widget
In Visual Studio, open the Renderer application.
- In the context menu of folder
Entities/Colors, click Add » Class…
- In Name, enter ColorsEntity.cs and click Add.
- In the class, paste the following code and save your changes:
- In the context menu of folder
ViewComponents, click Add » Class…
- In Name, enter ColorViewComponent.cs and click Add.
- In the class, paste the following code and save your changes:
- In the context menu of folder
Views/Shared/Components/Color, click Add » Class…
- Select Code File.
- In Name, enter Default.cshtml and click Add.
- In the class, paste the following code and save your changes:
Declare the custom color pallette
You need to declare the custom color palette in the application settings. You need to add the declaration in section "Widgets"/"Styling"/"Colorpalettes".
The appsettings.json file of your Renderer application should look similar to the following:
Build your solution.
Result
When you open your Renderer application and open the New editor, you will see the Colors widget in the widget selector. When you add the widget on your page, it displays two lines of text, colored differently. By editing the widget, you can change the colors - for the first line, you pick from the default color picker, for the second line - from the custom color picker.

Run the sample
This sample is available in Sitefinity’s GitHub repository. You can run and play with it.
To do this, perform the following:
- Go to Sitefinity’s GitHub repository Sitefinity ASP.NET Core samples.
- Expand Code and click Download ZIP.
- Extract the files on your computer.
- In the extracted folder, navigate to
sitefinity-aspnetcore-mvc-samples-master/src/color-palettes folder.
- Open the
color-palettes.sln in Visual Studio.
- Open the
appsettings.json file.
- In section
“Sitefinity”, change the “Url” property to the URL of your Sitefinity CMS site.
If you have deployed Sitefinity CMS on the IIS, point to “https://localhost:<https_port>".
- In Visual Studio, in the context menu of
color-palettes project, click View in Browser.
- Log in to your Sitefinity CMS instance and place the widget on a page.